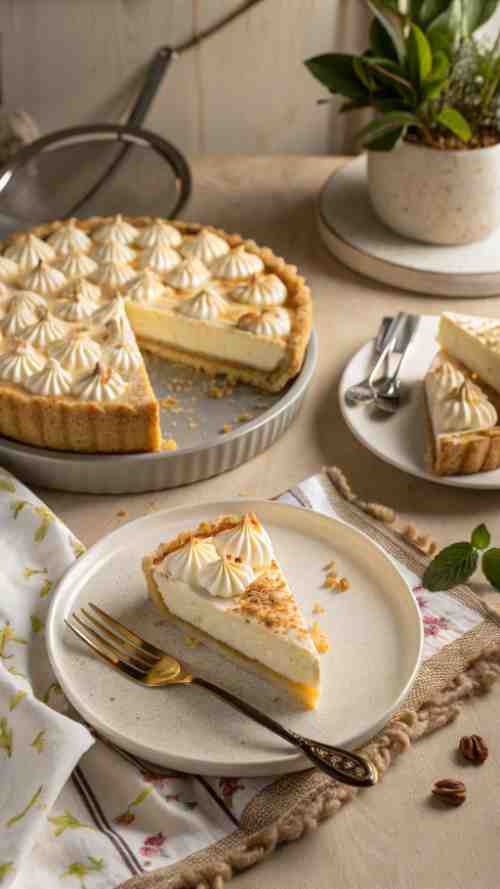
Easy S’mores Pie Recipe – The Ultimate Gooey, Chocolatey Dessert for Every Occasion
There’s just something about s’mores that makes me feel like a kid again. Maybe it’s the burnt marshmallow smell that reminds me of summer nights by the fire, or maybe it’s the fact that no matter how hard I try, I always end up with melted chocolate on my fingers. Either way, s’mores have a special place in my heart—and in my kitchen.
As a mom of three, I’m always on the lookout for easy pie recipes that don’t require a ton of effort but still taste like I spent hours in the kitchen. That’s where this s’mores pie recipe comes in. It’s got everything you love about s’mores—gooey marshmallows, melty chocolate, and that classic graham cracker crunch—but in pie form. No campfire required.
This easy s’mores pie is perfect for so many occasions. Need cabin dessert ideas for your weekend getaway? This pie travels well. Looking for a Christmas Eve dessert that isn’t just another plate of cookies? The kids (and adults) will devour this. Want a simple, crowd-pleasing treat for a summer barbecue? This is it. It even works as a smores frozen dessert if you chill it before serving.
If you’re a fan of unique s’mores recipes, this one’s a must-try. It’s the perfect mix of a good food dessert that feels nostalgic but a little fancy at the same time. Whether you call it a s’mores pie, s’more mini pie, or just smores in pie crust, one thing’s for sure—it’s dangerously good. So if you’re looking for the ultimate s’mores-inspired dessert, grab your ingredients and let’s make this happen.
Ingredients
For the Crust
- 1 ½ cups graham cracker crumbs (about 10 full crackers)
- 6 tablespoons melted butter
- ¼ cup granulated sugar
For the Chocolate Filling
- 1 cup heavy cream
- 8 ounces semi-sweet chocolate, chopped (or use chocolate chips)
- 1 teaspoon vanilla extract
- 2 eggs
- ¼ teaspoon salt
For the Topping
- 2 cups mini marshmallows (or big ones torn into pieces)
How to make S’mores Pie Recipe
Step 1: Make the Crust
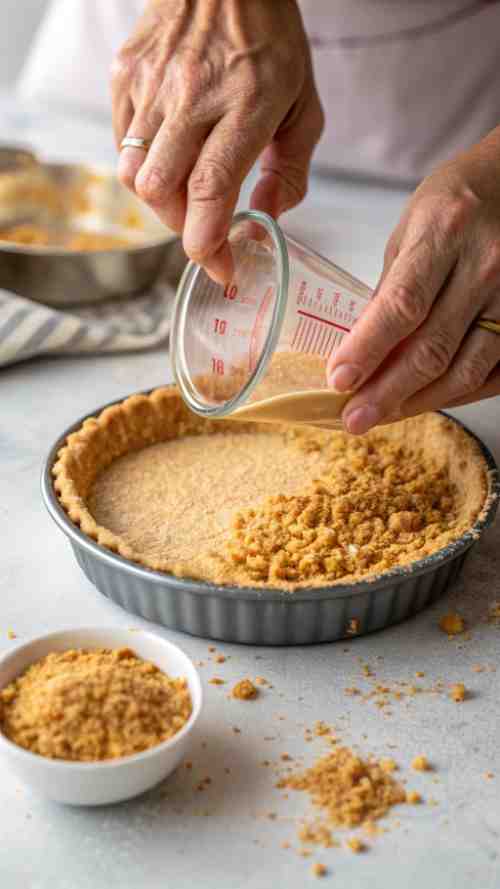
Preheat your oven to 350°F. If you have kids around, now’s a good time to send them off on a fun “mission” (aka, get them out of the kitchen before they start eating the ingredients).
Mix the graham cracker crumbs, melted butter, and sugar in a bowl until it looks like wet sand. If you’ve got little hands helping, let them mix—it’s an easy step for kids to do without causing too much chaos.
Press the mixture firmly into a 9-inch pie pan, making sure to go up the sides. You can use the bottom of a measuring cup to get it nice and even. Bake for 10 minutes and let it cool while you move on to the best part: chocolate.
Step 2: Make the Chocolate Filling
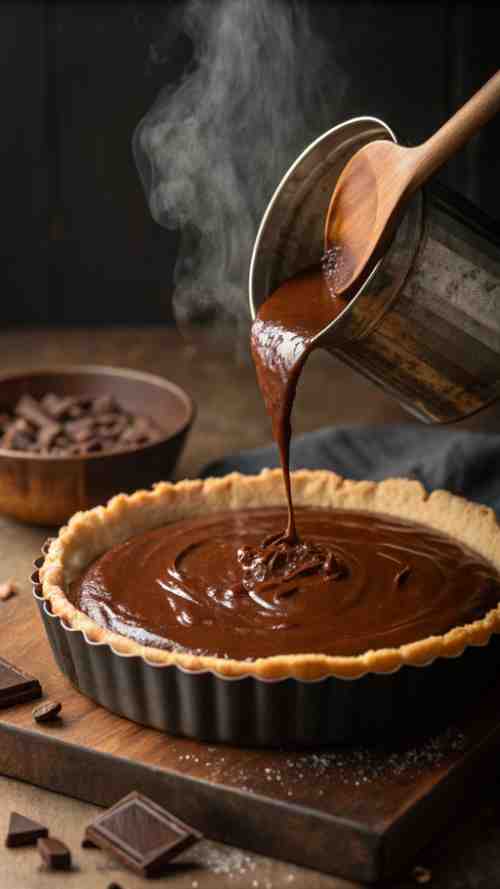
In a small pot, heat the heavy cream over medium heat until it’s hot but not boiling. If it starts bubbling, take it off the heat—you don’t want it too hot, or it’ll scramble the eggs later (yep, learned that the hard way).
Remove from heat and stir in the chopped chocolate until it melts completely. If your kids are watching, this is where they’ll start hovering. Chocolate melting = immediate interest.
Let it cool for about 5 minutes, then whisk in the vanilla, eggs, and salt. Pour the mixture into the cooled pie crust.
Step 3: Bake the Pie
Pop the pie into the oven and bake for 20–25 minutes. The filling should look set but still have a slight jiggle in the center when you shake it gently.
Now comes the hard part: waiting. Let the pie cool for at least 30 minutes before moving on to the marshmallow magic. Trust me, if you rush it, the marshmallows will just sink into a chocolate swamp.
Step 4: Add the Marshmallow Topping
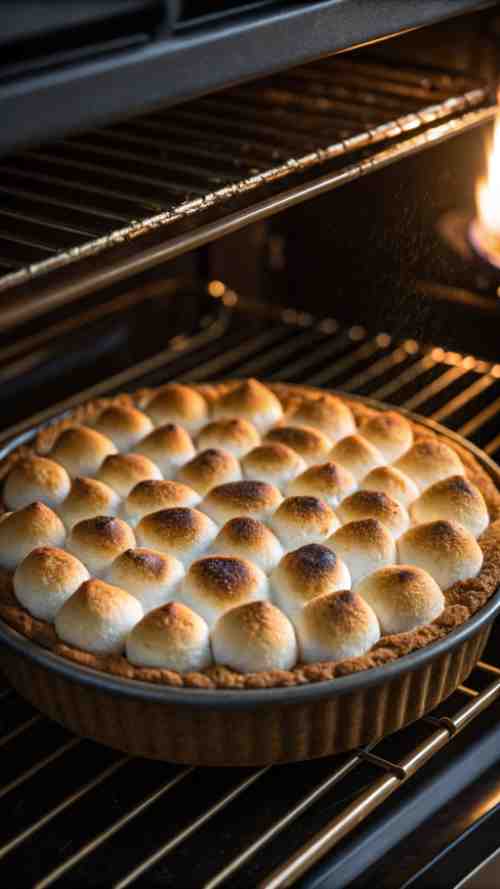
Once the pie is cool enough, sprinkle the mini marshmallows all over the top. Go ahead and pile them on—it’s s’mores, after all.
Turn your oven to broil (or get out a kitchen torch if you’re feeling fancy). Stick the pie on the top rack and watch it like a hawk. Marshmallows go from perfectly toasty to burnt in about 2.5 seconds. It should take 1–2 minutes to get that beautiful golden brown.
If you do accidentally burn them (been there), just scrape off the top layer and pretend it never happened.
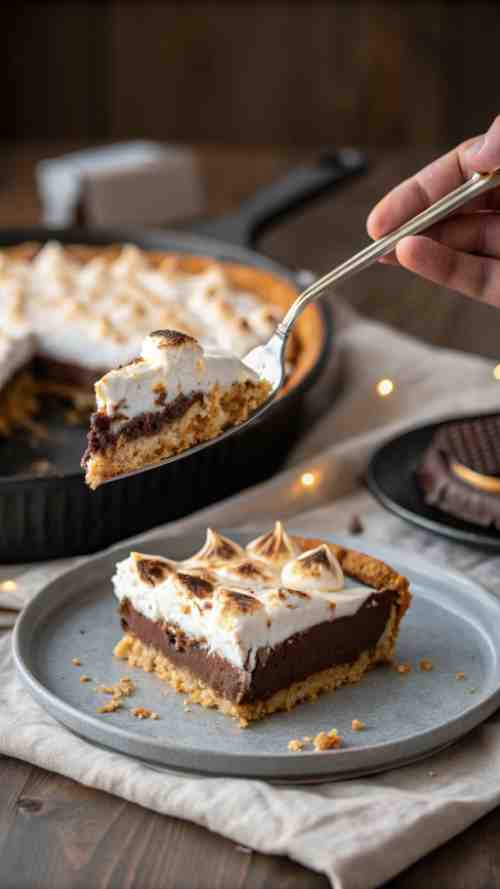
Step 5: Slice and Enjoy!
Here’s the deal: this pie is messy. The marshmallows are gooey, the chocolate is rich, and your kids will somehow end up with it all over their faces. But honestly, that’s part of the fun.
Let it cool for about 10 minutes before slicing (otherwise, it’ll be a delicious disaster). If you want to be extra, drizzle some melted chocolate or caramel on top. Or, if you’re like me, just grab a fork and dig in straight from the pan when no one’s looking.
FAQs for S’mores Pie
Can I make s’mores pie ahead of time?
Yes! You can bake the pie (without the marshmallows) up to 2 days in advance and store it in the fridge. When you’re ready to serve, add the marshmallows and broil them until toasty.
How do I store leftovers?
If you actually have leftovers (rare in my house), store the pie in an airtight container at room temperature for a day or in the fridge for up to 4 days. The marshmallows might get a little soft, but it’ll still taste amazing.
Can I freeze s’mores pie?
Yep! For a smores frozen dessert, bake the pie as usual (without marshmallows), let it cool, then wrap it tightly and freeze for up to 2 months. When ready to serve, thaw in the fridge overnight, add the marshmallows, and broil.
What kind of chocolate should I use?
I recommend semi-sweet or dark chocolate for a rich, balanced flavor. Milk chocolate works too, but it’ll make the pie a little sweeter. If you want extra fancy, mix in some bittersweet chocolate.
How do I toast the marshmallows without burning them?
Broil them on the top rack and watch them like a hawk. They can go from golden brown to burnt marshmallow in seconds. If you have a kitchen torch, that works too!
S’MORES PIE RECIPE Card
S’MORES PIE
Ingredients
Method
- Preheat oven to 350°F (175°C).
- Mix graham cracker crumbs, melted butter, and sugar until combined.
- Press into a 9-inch pie pan, making sure to go up the sides.
- Make the Chocolate Filling
- Heat heavy cream in a small saucepan over medium heat until hot (but not boiling).
- Remove from heat and stir in chocolate until melted and smooth.
- Let cool for 5 minutes, then whisk in vanilla, eggs, and salt.
- Pour into the pre-baked crust.
- Bake for 20–25 minutes, until the center is just set but slightly jiggly.
- Let cool for 30 minutes before adding marshmallows.
- Spread mini marshmallows evenly over the cooled pie.
- Turn oven to broil and place pie on the top rack.
- Broil for 1–2 minutes, watching closely, until marshmallows are golden brown.
- Let the pie cool for 10 minutes before slicing.
- Serve warm, or refrigerate for a chilled version.
Notes
- Make Ahead: Bake the pie without marshmallows and store in the fridge. Add marshmallows and broil just before serving.
- Gluten-Free: Use gluten-free graham crackers for the crust.
- No Broiler? Use a kitchen torch to toast the marshmallows.
- Extra Indulgent? Drizzle with melted chocolate or caramel before serving.
At the end of the day, nothing beats a good food dessert that brings everyone to the table—especially one that’s this easy to make. Whether you’re baking this s’mores pie recipe for a Christmas Eve dessert, whipping it up for a summer BBQ (because, let’s be real, s’mores are the ultimate food idea for summer), or just need a last-minute easy pie that doesn’t require a grocery store run, this one’s a winner.
I love how this pie takes everything we love about s’mores—gooey marshmallows, melty chocolate, crunchy graham crackers—and puts it into something way less messy (and way less risky than handing my kids flaming marshmallow sticks). It’s also a fun twist if you’re looking for unique s’mores recipes beyond the usual campfire treat. Want to make it ahead? Try a smores frozen dessert version by chilling it before serving. Need individual portions? Turn it into s’more mini pies. It’s flexible, fun, and always a crowd-pleaser.
So whether you’re looking for cabin dessert ideas, an easy pie recipe for a lazy weekend, or just craving a little chocolate-marshmallow goodness, give this s’mores pie easy recipe a try. Just keep an eye on the marshmallows when broiling—because no one wants accidentally burnt marshmallow (unless you’re into that, in which case, go for it). Enjoy!