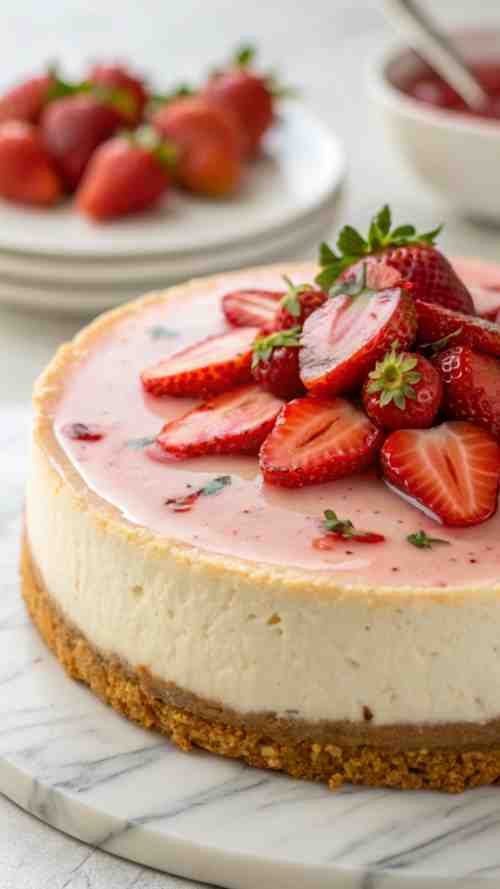
Easy Strawberry Tart Recipe: A Delicious Fresh Fruit Tart with Creamy Filling and Sweet Strawberry Topping
There are a lot of fancy dessert tarts out there, but I wanted something that’s simple enough for us busy folks but still looks like a million bucks. Enter this Fresh Fruit Tart. It’s one of those fruit tart recipes that’s not only easy to make but also a total showstopper. And let’s be real—who doesn’t love a good strawberry cheesecake tart? This strawberry tart recipe is everything you want: creamy, sweet, and totally strawberry dessert recipe worthy. Plus, it’s got that strawberry tart aesthetic that makes it perfect for any occasion.
I’ve tried a lot of strawberry tarts recipes, but this one is my go-to. It’s a total win with the kids (who love helping me decorate the top with fresh berries) and a big hit with friends and family when we have gatherings. So if you’re wondering how to make a tart that’s easy, delicious, and just the right balance of sweet and fresh, keep reading! This Strawberry Tart Recipe is the answer to all your dessert dreams. Let’s get baking!
Ingredients
For the crust:
- 1 ½ cups all-purpose flour
- ½ cup unsalted butter (room temp)
- ¼ cup powdered sugar
- 1 egg yolk
- 1 tsp vanilla extract
- Pinch of salt
For the filling:
- 8 oz cream cheese (softened)
- 1 cup powdered sugar
- 1 tsp vanilla extract
- 1 cup heavy cream (chilled)
For the topping:
- 2 cups fresh strawberries (sliced)
- Optional: a little strawberry jam or honey to glaze
Step-By-Step Instructions
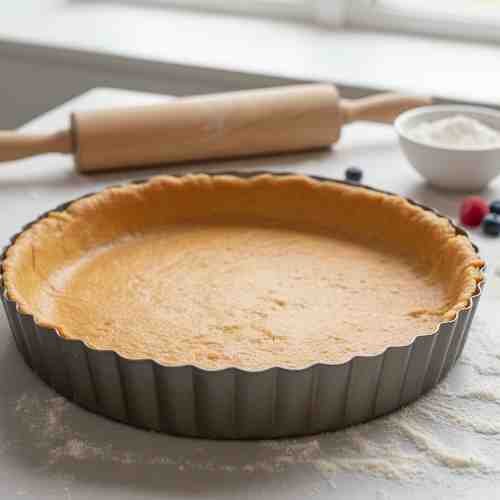
1. Make the Tart Crust
First, preheat your oven to 350°F. Trust me, you want that oven nice and hot for the crust.
In a big bowl, mix the flour, powdered sugar, and a pinch of salt. Now, take the softened butter (make sure it’s not too cold!) and cut it into the dry ingredients. You can use a pastry cutter or, like me, just use your hands (you’ll get a little messy, but that’s half the fun). Mix it until it looks like little crumbs.
Then, add the egg yolk and vanilla extract. You don’t need a fancy mixer for this—just mix it until the dough starts to come together. If it’s too crumbly, you can add a little splash of water, but usually, it works just fine.
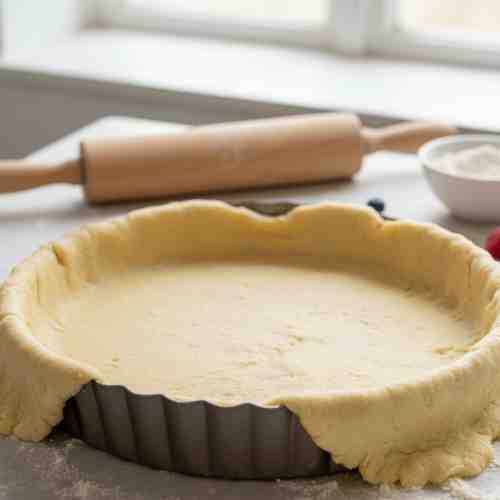
Once the dough is ready, roll it out on a floured surface, making it big enough to fit into your tart pan (mine’s 9 inches). Press the dough into the pan, making sure to get it into the edges. Then, take a fork and poke the bottom a few times. This helps it bake without puffing up.
Pop the pan into the oven and bake for about 10-12 minutes, or until the crust is a light golden brown. While it’s baking, go ahead and clean up any mess you’ve made (I always use the time to get the kids’ snacks ready). Once the crust is done, let it cool completely.
2. Make the Cream Cheese Filling
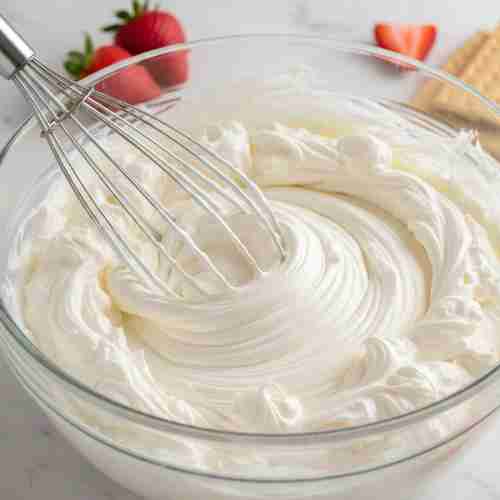
While your crust is cooling, let’s make the filling. Take your softened cream cheese and put it in a mixing bowl. Add the powdered sugar and vanilla extract. Use a hand mixer (or a whisk if you’re feeling strong) and beat it together until it’s smooth and creamy. This is probably the easiest part—just a couple minutes of mixing.
Now, in a separate bowl, whip the heavy cream until it forms soft peaks. This means it should be fluffy, but not so stiff that it’s like butter. Gently fold the whipped cream into the cream cheese mixture. You want it to be light and fluffy, so don’t overmix it. Just fold it until it’s well combined.
3. Assemble the Tart
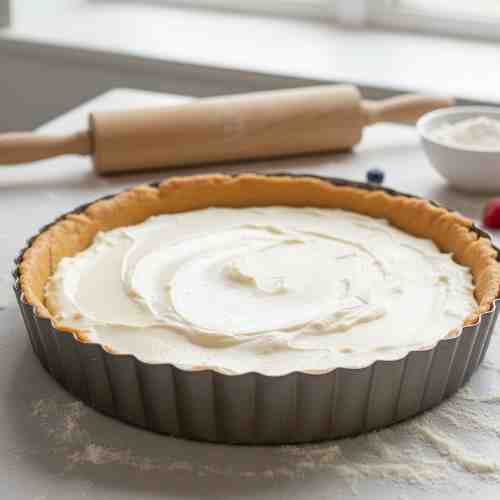
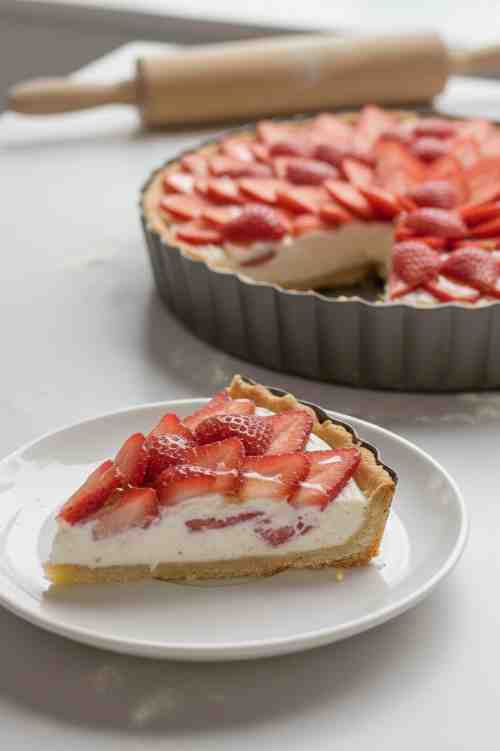
Once your tart crust has cooled down, it’s time to fill it up! Spoon that creamy goodness into your crust and spread it out evenly. You can use a spatula to make it smooth, or you can get fancy and make little swirls (no one’s judging you).
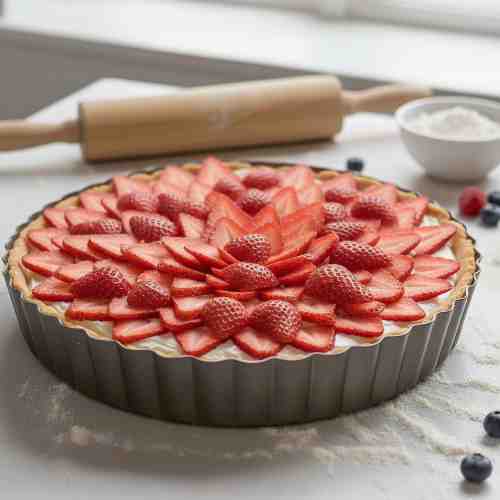
Next, slice up your strawberries. I like to slice them pretty thin, but you do you. The fun part is arranging them on top. You can make a circle, a fan shape, or whatever design you want.
4. Optional Glaze (But Totally Worth It)
If you want to make it look extra shiny and pretty, warm up a little strawberry jam or honey in the microwave for 20 seconds until it’s smooth and pourable. Then, using a brush or spoon, gently brush it over the strawberries. This step is optional, but it adds that extra little “wow” factor that makes it look like you spent hours on it.
5. Chill and Serve
Pop your tart into the fridge for about an hour. This helps everything set and makes it easier to slice. Once it’s chilled, it’s ready to serve!
FAQs for Strawberry Tart Recipe
Can I use a different type of fruit for this tart?
Absolutely! While strawberries are the star here, you can totally switch things up. You can use raspberries, blueberries, or even a mix of fruits. A fresh fruit tart with a variety of berries looks beautiful, and the flavor will still be delicious.
How do I keep my tart from getting soggy?
This is a great question! To keep your tart crust from getting soggy, make sure you bake it until it’s golden brown and crisp. Also, don’t add the filling until your crust is completely cooled. If you’re making it ahead of time, you can even put a thin layer of melted chocolate on the crust before adding the cream cheese filling. This helps create a barrier between the filling and the crust.
Can I use store-bought crust?
Yes! I totally get it if you’re short on time (we’ve all been there). A store-bought tart crust works just fine. If you use a pre-made crust, it cuts down on time, and the tart will still be delicious. Sometimes, you need shortcuts when life’s busy, and that’s okay!
What kind of cream cheese should I use?
I recommend using regular, full-fat cream cheese. It gives the tart the rich, creamy texture you want. Low-fat versions can sometimes be a little too runny, and that’s not the vibe we’re going for here.
Can I make individual tarts instead of one big one?
Yes, you can definitely make individual strawberry tarts instead of one large tart. Just use a muffin tin or small tart pans, and follow the same steps for the crust and filling. These mini versions are perfect for parties or if you just want your own personal-sized tart!
Strawberry Tart Recipe
Strawberry Tart
Ingredients
Method
- Preheat oven to 350°F (175°C).
- In a bowl, combine flour, powdered sugar, and salt. Add butter and mix until crumbly.
- Add egg yolk and vanilla extract, and mix until dough forms. Roll dough and press into a 9-inch tart pan.
- Prick the bottom with a fork and bake for 10-12 minutes until golden brown. Let it cool completely.
- Beat cream cheese, powdered sugar, and vanilla extract until smooth.
- In a separate bowl, whip the heavy cream to soft peaks. Gently fold the whipped cream into the cream cheese mixture until smooth and fluffy.
- Once the crust is cooled, spread the cream cheese filling evenly on top.
- Arrange the sliced strawberries on top in a pattern you like.
- Optionally, brush with strawberry jam or honey for a glossy finish.
- Refrigerate for 1 hour to allow the tart to set. Slice and serve!
Notes
- If you’re short on time, you can always use store-bought tart crust or even puff pastry. I get it—life is busy!
- Feel free to switch up the fruit—raspberries or blueberries would work perfectly if you’re not a strawberry person.
- Make sure your cream cheese is softened before you start mixing. No one wants lumpy filling!
This fresh fruit tart is definitely one of my favorites, especially since it’s so easy to make but still looks like a fancy treat. I love how the strawberry tart aesthetic turns out every time—so pretty, right? If you’ve ever wondered how to make strawberry cheesecake tarts, this recipe is a great starting point. And honestly, I think it’s one of the best strawberry dessert recipes around.
So, if you’re craving something sweet, give this strawberry tart recipe easy a try. It’s always a hit, whether for a special occasion or just because you deserve a treat. Trust me, once you try this strawberry tarts recipe, it’ll be one of your go-to dessert tarts for sure. I hope your family loves it as much as mine does! Happy baking, friends!