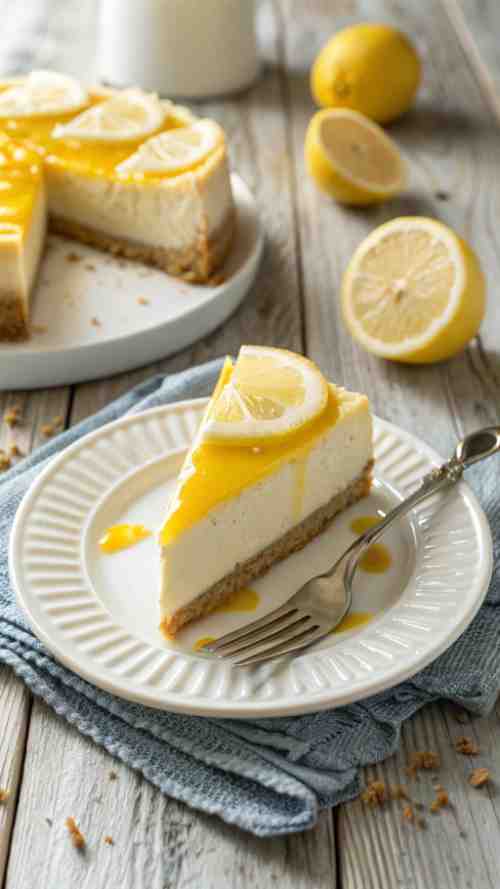
Lemon Cream Brûlée: The Ultimate Easy Sweet Recipe for a Luxurious Dessert
Now, I know what you might be thinking—”That looks way too fancy for me to make.” Listen, as a mom of three, I do not have time for fussy recipes. If I’m making a dessert, it better be simple, delicious, and worth the dishes. And trust me, this lemon cream brulee is all of the above.

This is one of those fabulous desserts that feels elegant but is secretly easy. It’s smooth, creamy, just the right amount of sweet, with that little burst of fresh lemon that takes it to a whole new level. It’s like sunshine in dessert form. And if you’re a fan of lemon sweets, you are absolutely gonna love this.
So whether you’re looking for an easy sweet recipe to impress guests, a new lemon creme brulee recipe to add to your rotation, or just an excuse to break out the kitchen torch (because that part is so fun), this one’s for you. Let’s make some lemon brulee!
What You’ll Need
- 2 cups heavy cream – Because we’re not here for anything less than full, rich, creamy goodness.
- 1/2 cup granulated sugar – Plus extra for that caramelized top.
- 4 large egg yolks – Save the egg whites for omelets or pretend you’ll make meringue (we all know you won’t).
- 1 tablespoon lemon zest – About 2 lemons’ worth. It adds a bright, fresh flavor.
- 1/4 cup fresh lemon juice – Bottled lemon juice? Nope. You deserve better.
- 1 teaspoon vanilla extract – A little extra depth of flavor.
- Pinch of salt – Because salt makes everything better.
Step 1: Preheat & Set Up
Preheat your oven to 325°F. Grab a deep baking dish (like the kind you use for lasagna) and set 4 to 6 ramekins inside it. We’re gonna bake these in a water bath, which sounds super professional but really just means we pour hot water around them so they cook gently. No stress.
Step 2: Heat the Cream

Pour the heavy cream into a saucepan. Add the lemon zest and vanilla extract, then heat it over medium heat until it’s hot but not boiling. You want it warm enough to release all that lemony goodness, but if you see bubbles, turn it down. Give it a stir now and then so it doesn’t scorch.
Once it’s warm, take it off the heat and let it sit for a few minutes. Think of this as steeping tea—only instead of tea, we’re infusing cream with lemon magic.
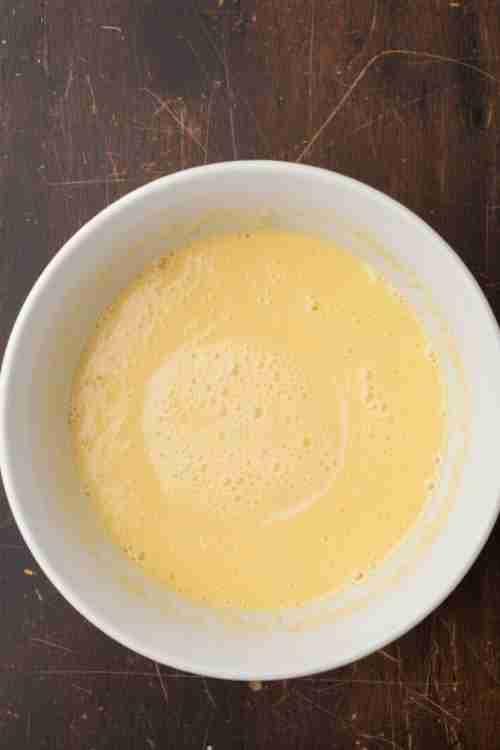
Step 3: Whisk the Egg Yolks and Sugar

In a mixing bowl, whisk together the egg yolks, sugar, salt, and lemon juice until the mixture looks pale and slightly thick. This takes about a minute, so don’t go wild. Just a nice, steady whisk.
Step 4: Temper the Eggs (a.k.a. Don’t Scramble Them)
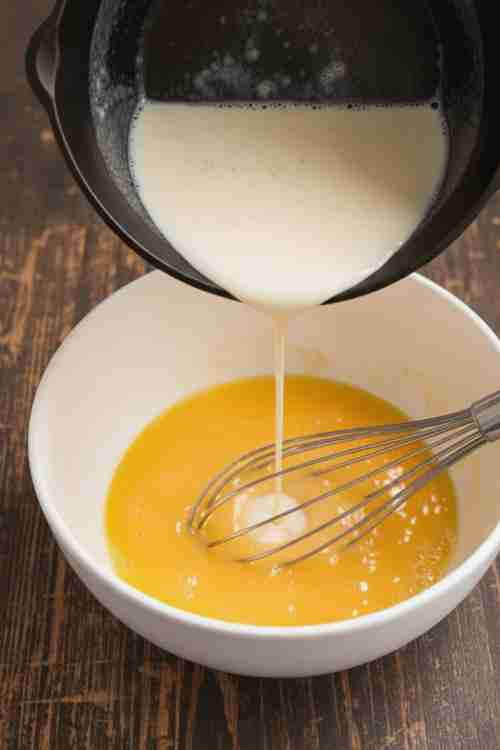
Okay, this is the part where people get nervous, but I promise it’s easy. You’re going to slowly pour a little bit of the warm cream into the egg mixture while whisking constantly. This brings the temperature up gradually so the eggs don’t cook too fast.
Once you’ve added about half the cream, go ahead and pour in the rest while whisking. Boom. You just tempered eggs. Fancy chef moment achieved.
Step 5: Strain & Pour
To keep things extra smooth, pour the mixture through a fine-mesh strainer into a measuring cup or bowl. This catches any little bits of egg or zest that didn’t blend in perfectly. Then, divide the custard evenly among your ramekins.
Step 6: Bake in a Water Bath

Now, the whole water bath thing. Boil some water (a kettle makes this easy, but a pot works too). Place the baking dish with your ramekins in the oven, then carefully pour the hot water around them until it reaches about halfway up the sides of the ramekins. This helps the custard cook evenly without cracking.
Bake for 30-35 minutes, or until the centers are just barely set but still have a slight jiggle when you tap the pan. Think Jell-O, not soup.
Take them out, let them cool a bit, then transfer them to the fridge for at least 3 hours (overnight is best). This is the hardest part—waiting.
Step 7: Time to Torch That Sugar
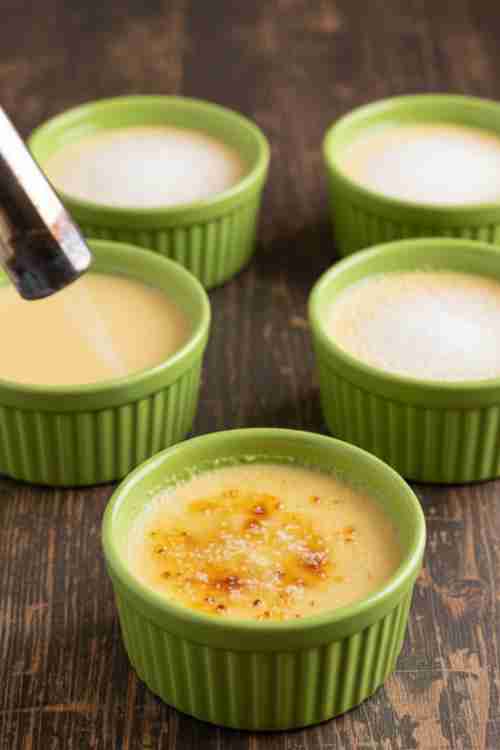
Alright, here’s where the magic happens. Once the custards are chilled, sprinkle a thin, even layer of sugar on top of each one. Now, grab your kitchen torch and gently melt the sugar until it turns golden and crackly. If you don’t have a torch, you can put them under the oven broiler for a minute or two—but watch them like a hawk because they go from golden to burnt in a hot second.
Step 8: Crack & Enjoy

Let the brûlée sit for about a minute so the sugar hardens. Then grab a spoon, give it a little tap (so satisfying, right?), and dig in. The creamy, lemony custard with that crisp, caramelized top is everything.
FAQs for Lemon Cream Brûlée

Do I need a kitchen torch to make crème brûlée?
Nope! While a torch gives you the best caramelized sugar top, you can also use your oven’s broiler. Just place the ramekins under the broiler for 1-2 minutes, watching closely so the sugar doesn’t burn.
Can I make this Lemon Cream Brûlée ahead of time?
Yes! The custard needs at least 3 hours to chill, but you can make it up to 2 days in advance. Just wait until right before serving to brûlée the sugar so it stays crisp.
What if I don’t have ramekins?
No problem! Small oven-safe bowls or even a muffin tin can work in a pinch. Just adjust baking time if needed since different containers may affect how fast it sets.
Why is my crème brûlée runny?
If it’s still liquidy after baking, it probably needed a few more minutes in the oven. The center should jiggle slightly, like Jell-O, but not be sloshy. Also, make sure you chilled it long enough—at least 3 hours, overnight is best!
How do I get an even caramelized sugar topping?
Sprinkle a thin, even layer of sugar over the custard and move the flame (if using a torch) in small circles, keeping it a few inches away. If using a broiler, rotate the ramekins halfway through for even browning.
Lemon Cream Brûlée Recipe Card
Lemon Cream Brûlée
Ingredients
Method
- Preheat oven to 325°F (163°C).
- Place 4-6 ramekins in a deep baking dish.
- In a saucepan over medium heat, warm the heavy cream, lemon zest, and vanilla extract until hot but not boiling.
- Remove from heat and let sit for 5 minutes to infuse flavor.
- In a mixing bowl, whisk together egg yolks, sugar, salt, and lemon juice until pale and smooth.
- Slowly pour a little of the warm cream into the egg mixture, whisking constantly.
- Gradually add the rest while whisking to prevent scrambling.
- Strain the mixture through a fine-mesh sieve into ramekins.
- Pour hot water into the baking dish until it reaches halfway up the ramekins.
- Bake for 30-35 minutes, or until the center is set but still slightly jiggly.
- Let cool, then refrigerate for at least 3 hours.
- Before serving, sprinkle a thin, even layer of sugar over each custard.
- Use a kitchen torch to caramelize the sugar, or place under a broiler for 1-2 minutes.
- Let the sugar harden for 1 minute, then crack with a spoon and enjoy!
Notes
- No torch? Use the oven broiler, but keep a close eye on it.
- Make ahead: The custard can be made 1-2 days in advance, but brûlée the sugar right before serving.
- For extra lemon flavor, add an extra teaspoon of zest!
And there you have it—Lemon Cream Brulee that’s fancy enough for a dinner party but easy enough to make on a random Wednesday night (because let’s be honest, some days just need dessert).
I know brulee desserts might seem intimidating, but once you try this crème brûlée recipe, you’ll realize it’s actually one of those easy sweet recipes you can pull off without a ton of effort. Just a little whisking, a little baking, and then the best part—caramelizing that sugar into the perfect crispy topping.
This lemon brulee is hands-down one of my favorite fabulous desserts because it’s creamy, smooth, and has that perfect balance of sweet and citrusy. If you’re a fan of lemon sweets, this one’s gonna be a keeper. And let’s be real—anything that lets me crack into dessert with a spoon is a win in my book.
So go ahead, give this lemon crème brûlée recipe a try! And if your kids (or spouse) try to steal yours, just remind them that this is grown-up dessert. They can have a cookie.